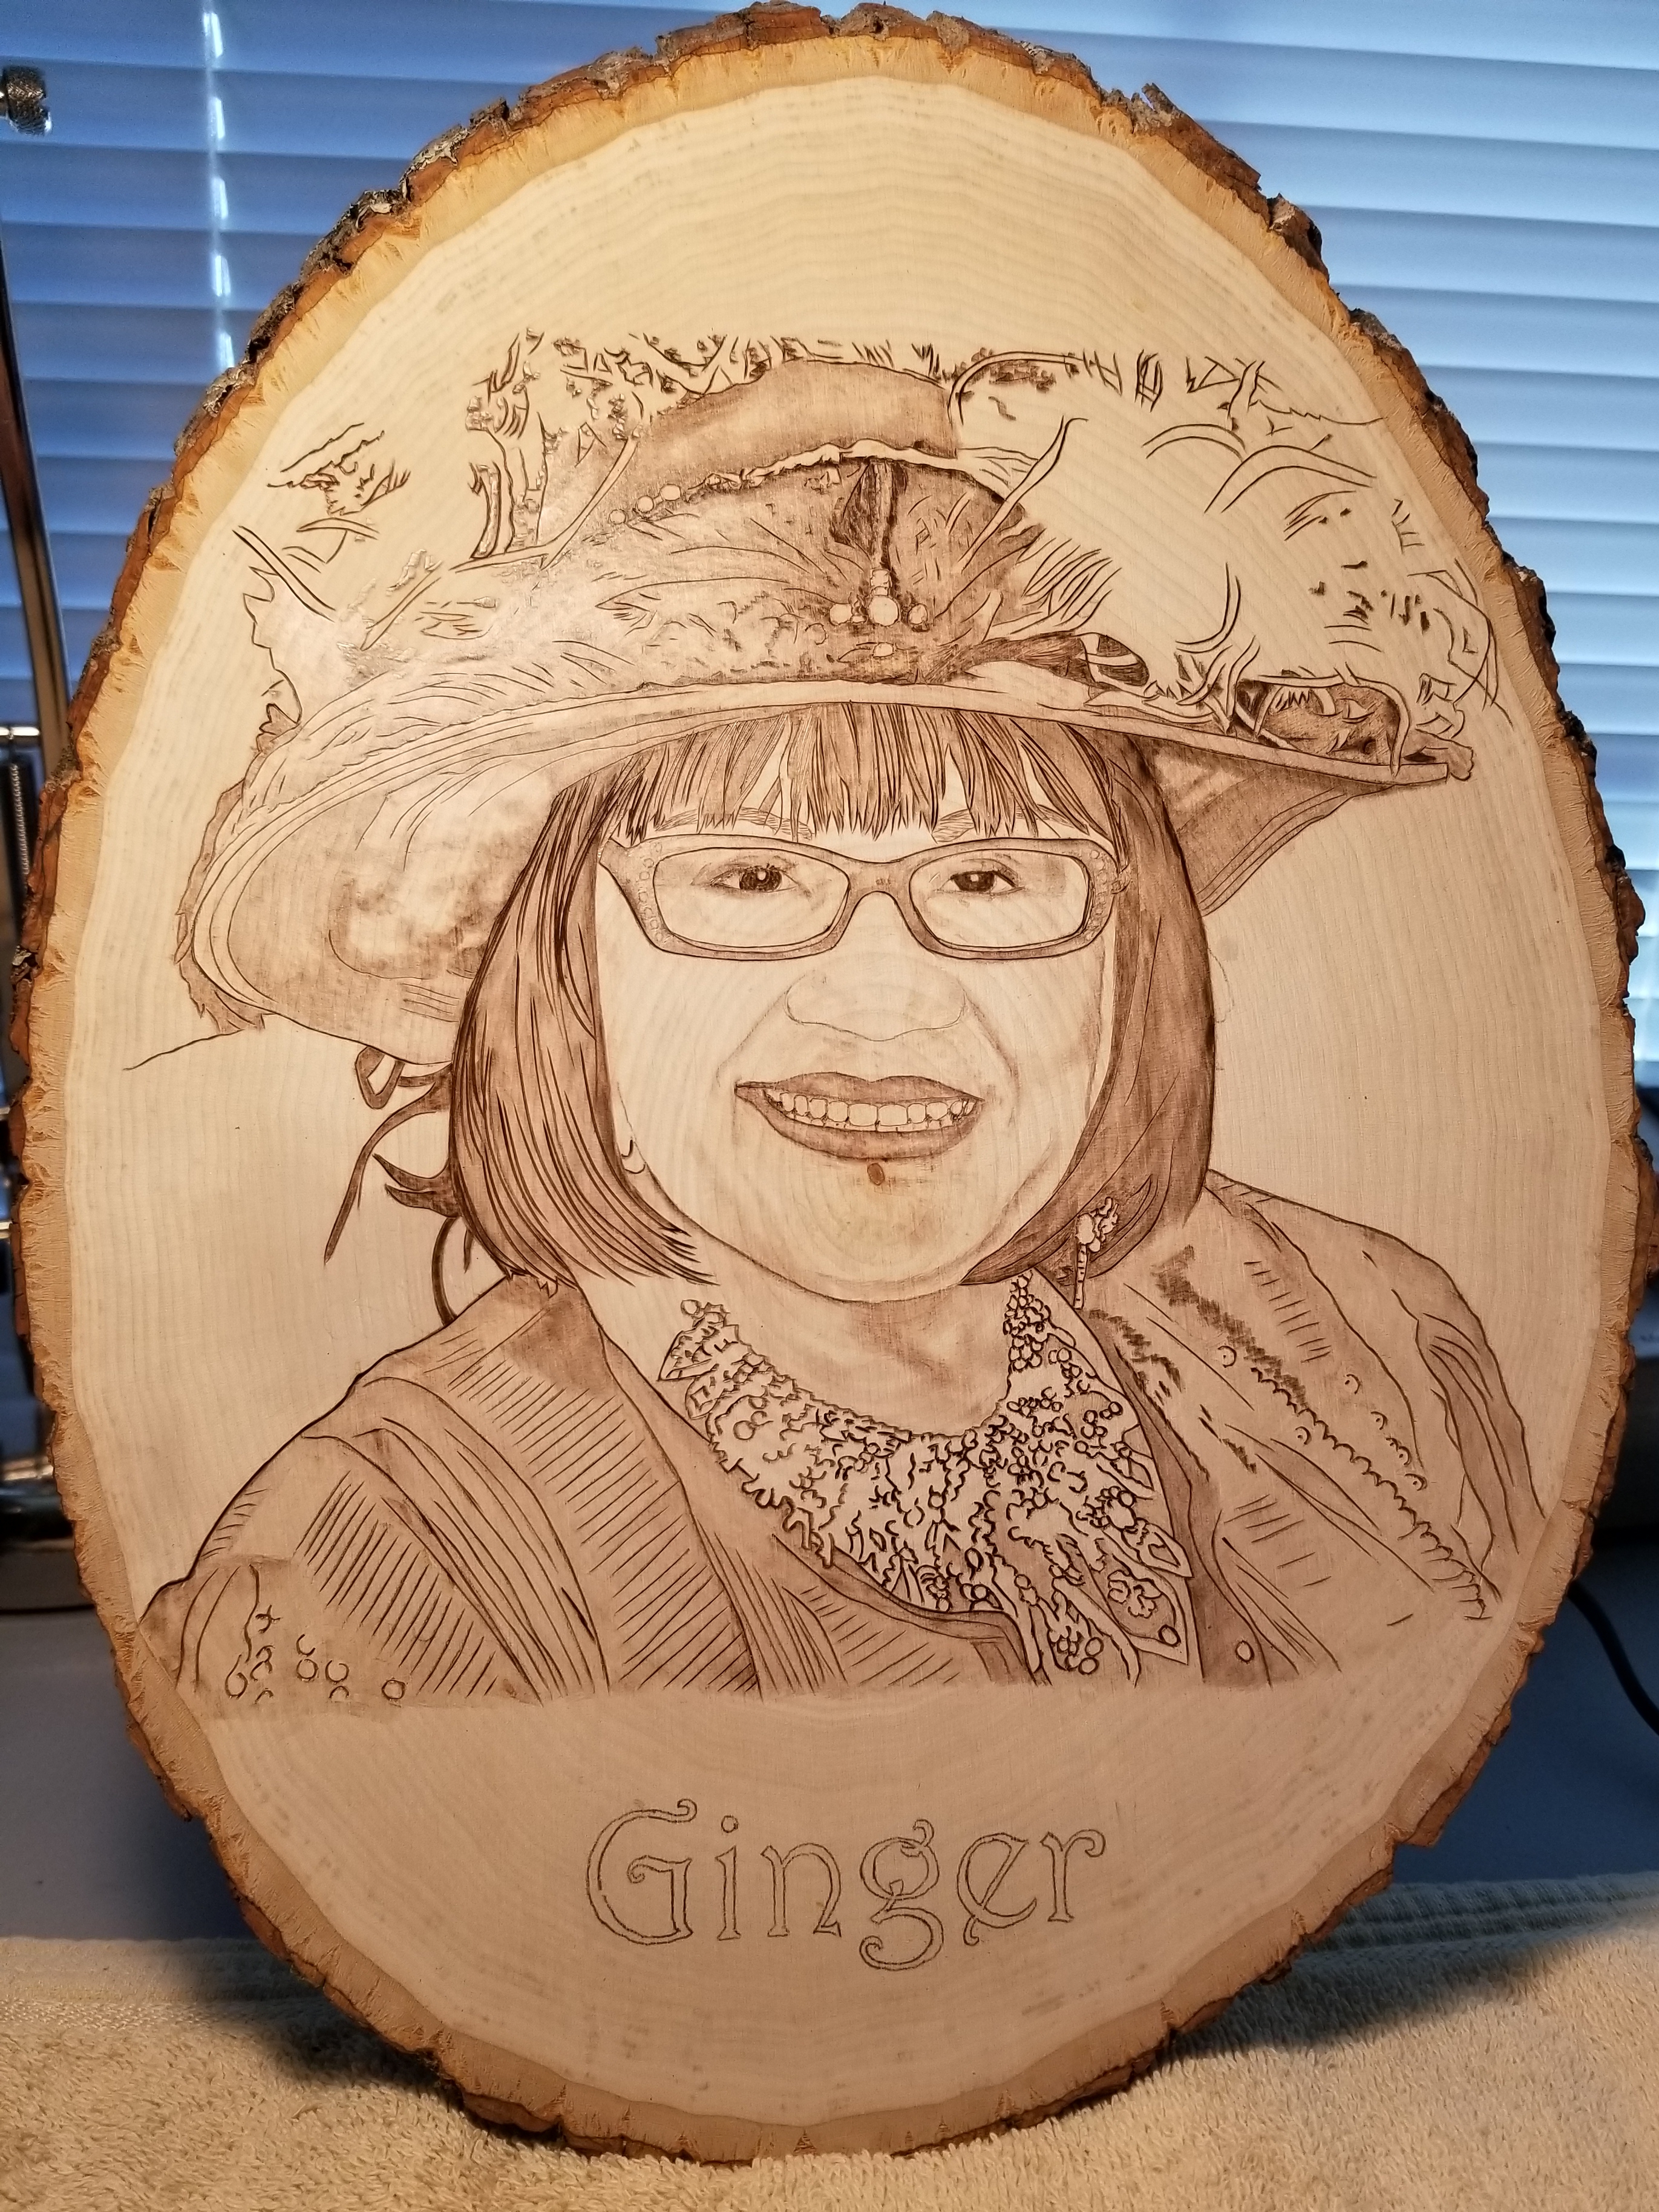
Ginger


I had the pleasure of completing this special portrait for a client recently. It was a gift for a dear friend whose mother (Ginger) had passed away recently. I hadn’t even considered that, surprisingly, this type of project would become a fairly frequent source of clients for me.
My guess is that, unlike a photo, or even a painting or drawing, a pyrography portrait is an especially warm and personal remembrance of the person depicted.
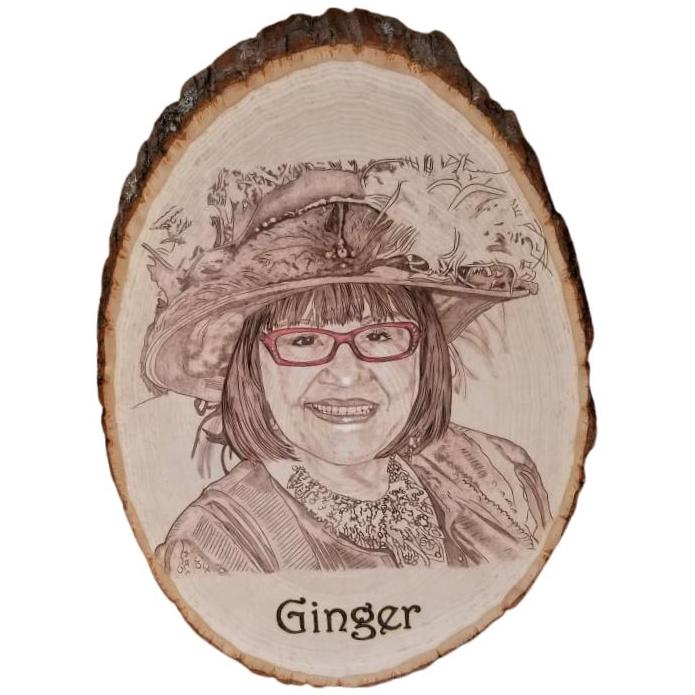
I especially love this image! Because the lovely woman portrayed exudes so much personality and a vibrant life force! I was also excited when the client told me she wanted to include a bit of spot color to make the portrait POP! Along with the hand-lettering of her name beneath the image.
I’ll break down my process by individual photo below so that you get a better, up-close view of each one.
THE ORIGINAL PHOTO
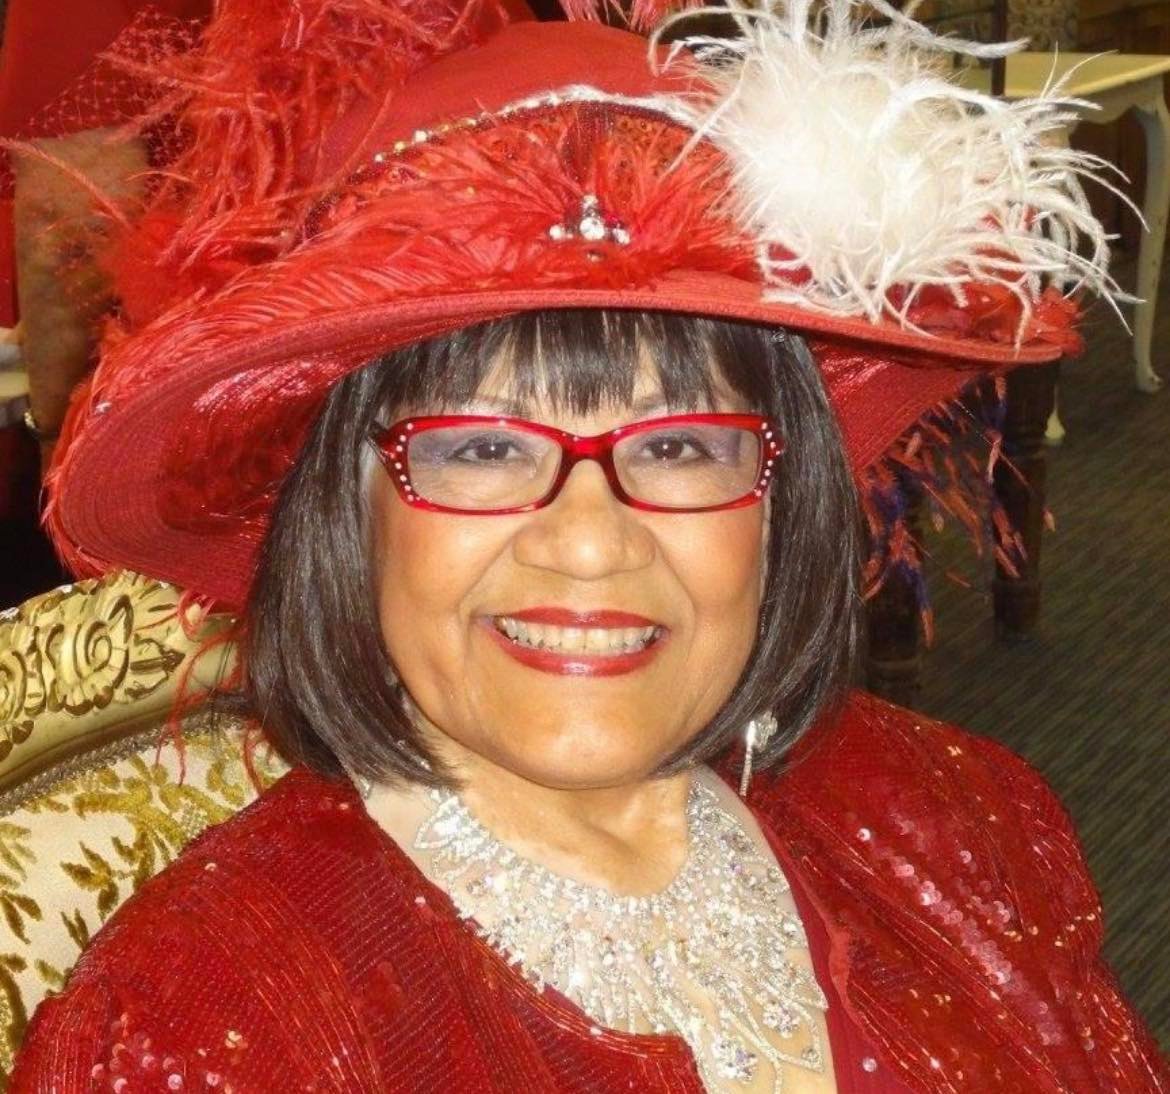
This is the digital image my client provided to me. Such a beautiful subject! And yet…SO MUCH detail…which can be a little overwhelming. From the ornate necklace to the sequins on the clothing to all those feathers and gems on her hat. This was not a simple piece to tackle.
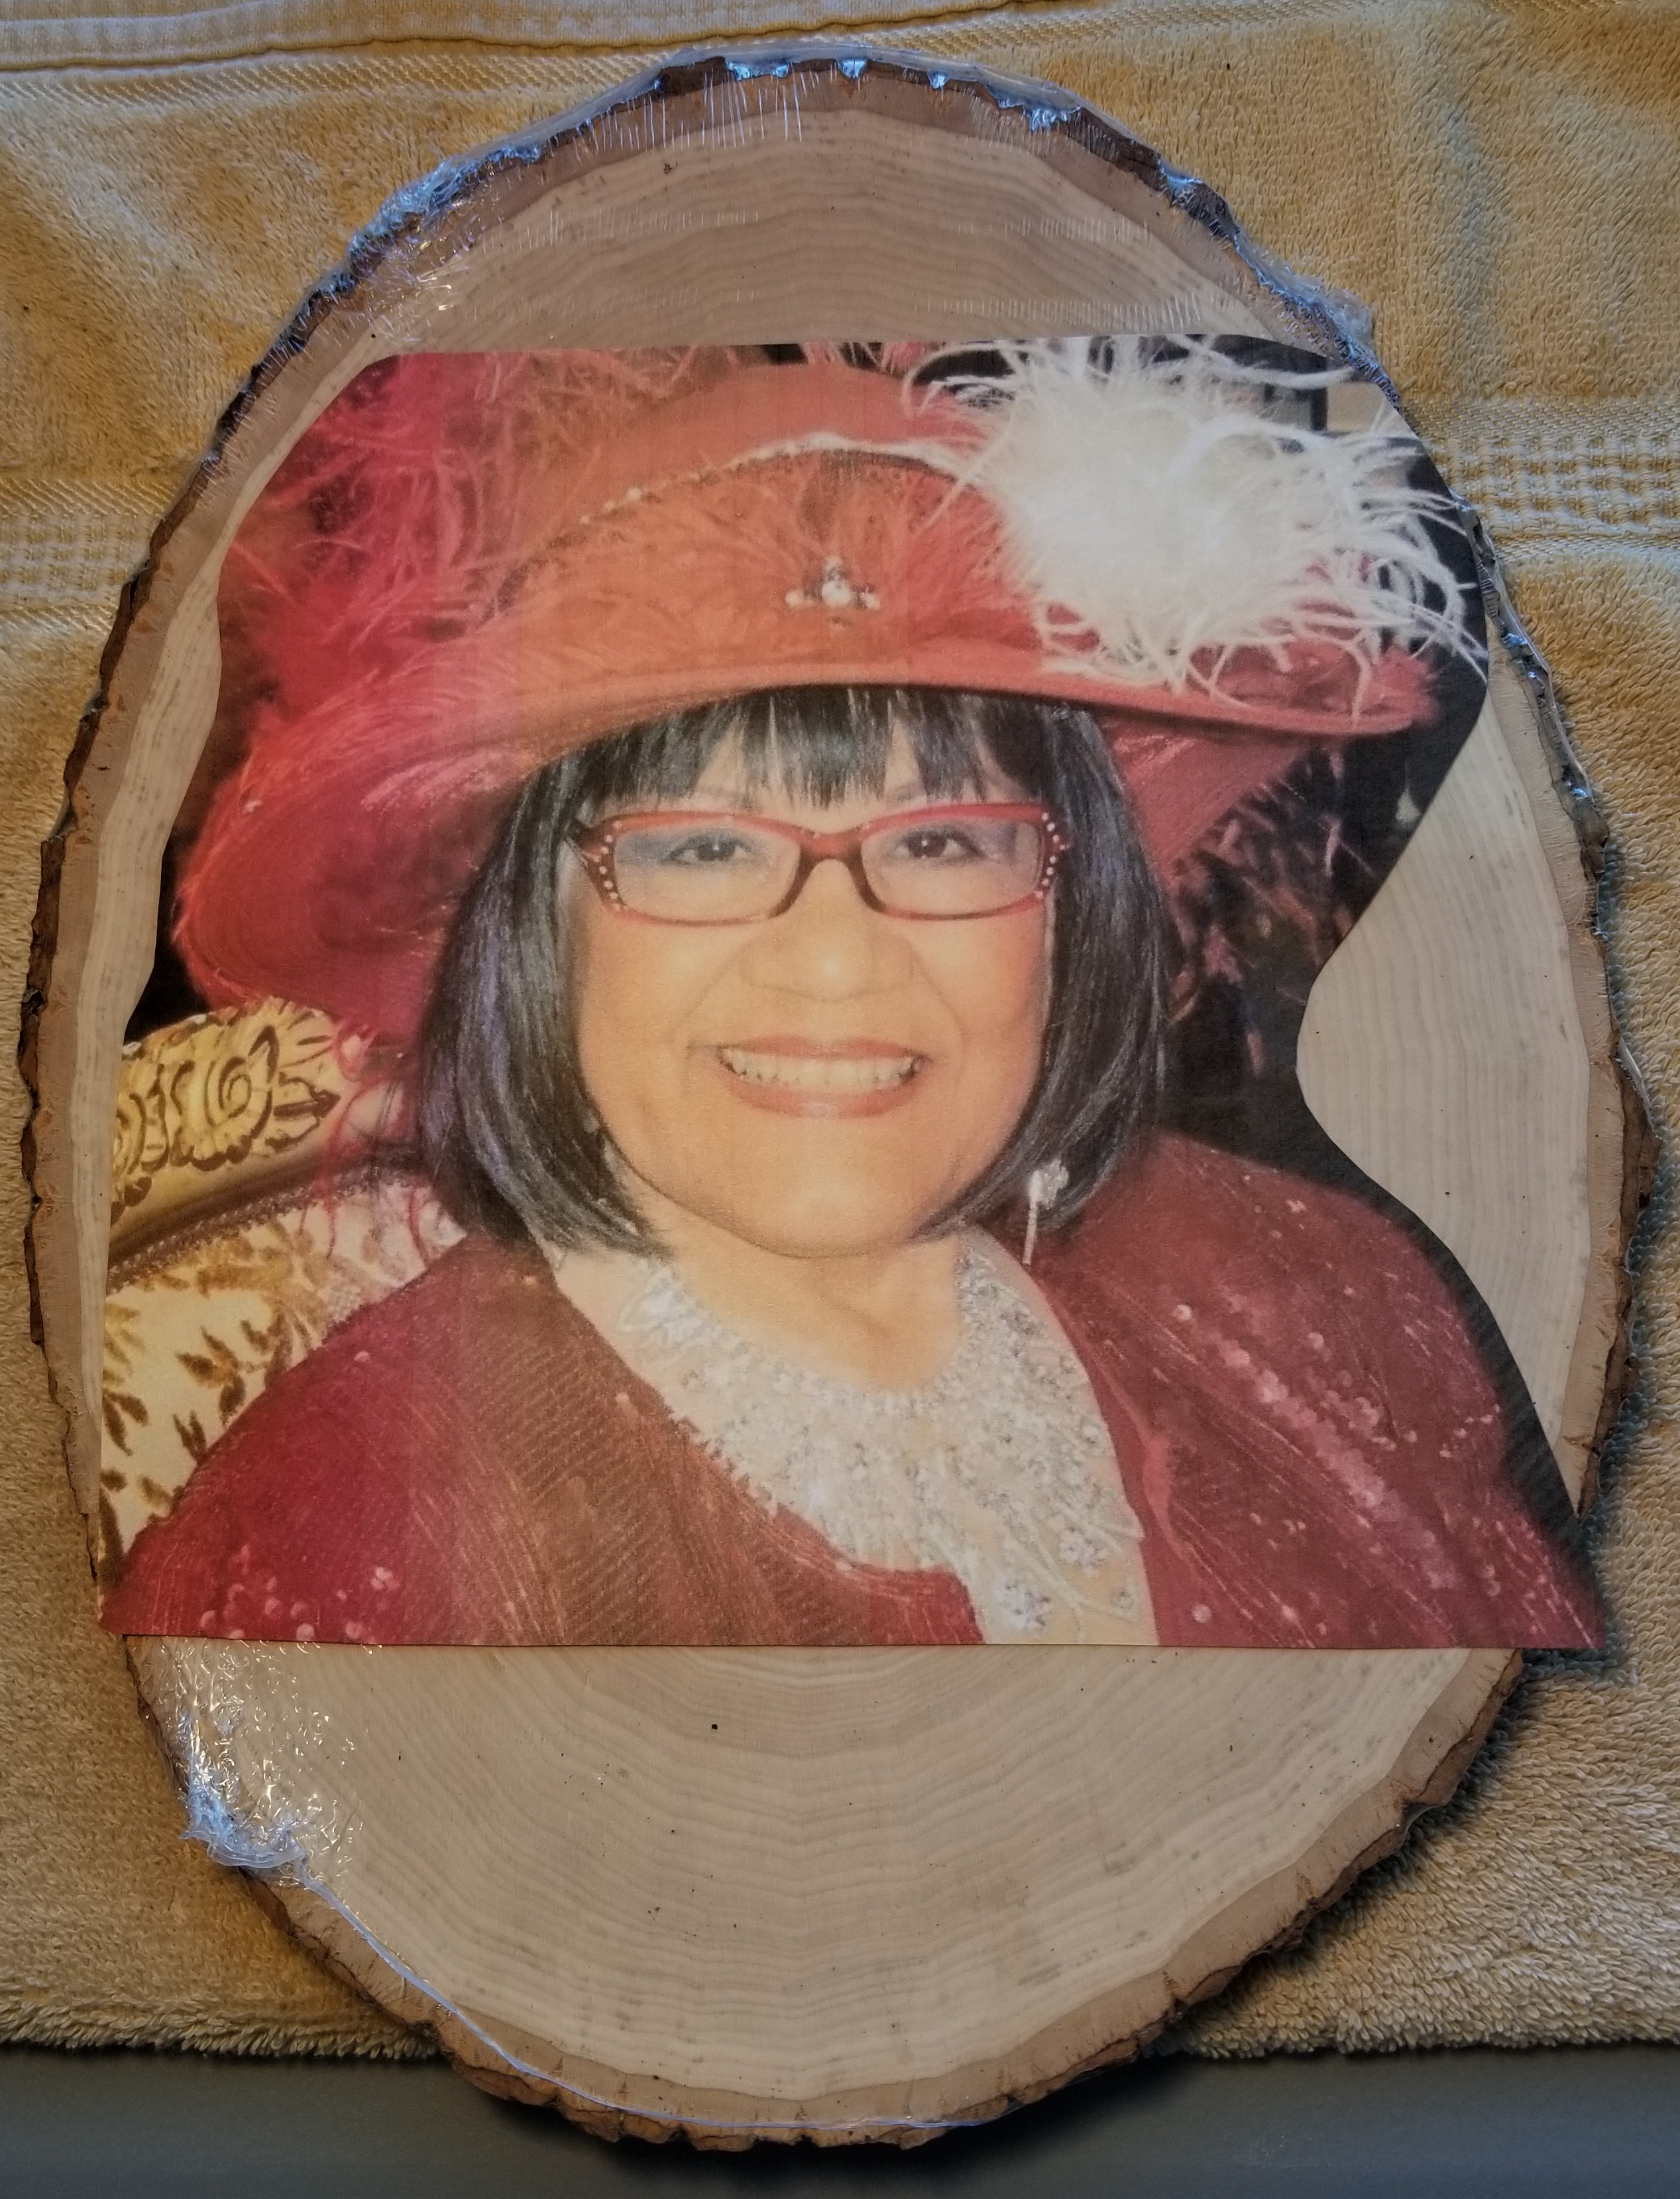
THE ART TRANSFER

The first step in my process always involves printing out the image, then laying it out on the surface it will be burned on. Sometimes, on larger pieces, this can require calculations, dividing the image into smaller parts, then printing each to create the entire project. In this case, the commissioned piece was small enough (11X14”) to print out in a single piece. I snap a photo like this one and get approval on positioning from my client before moving forward with the art transfer.
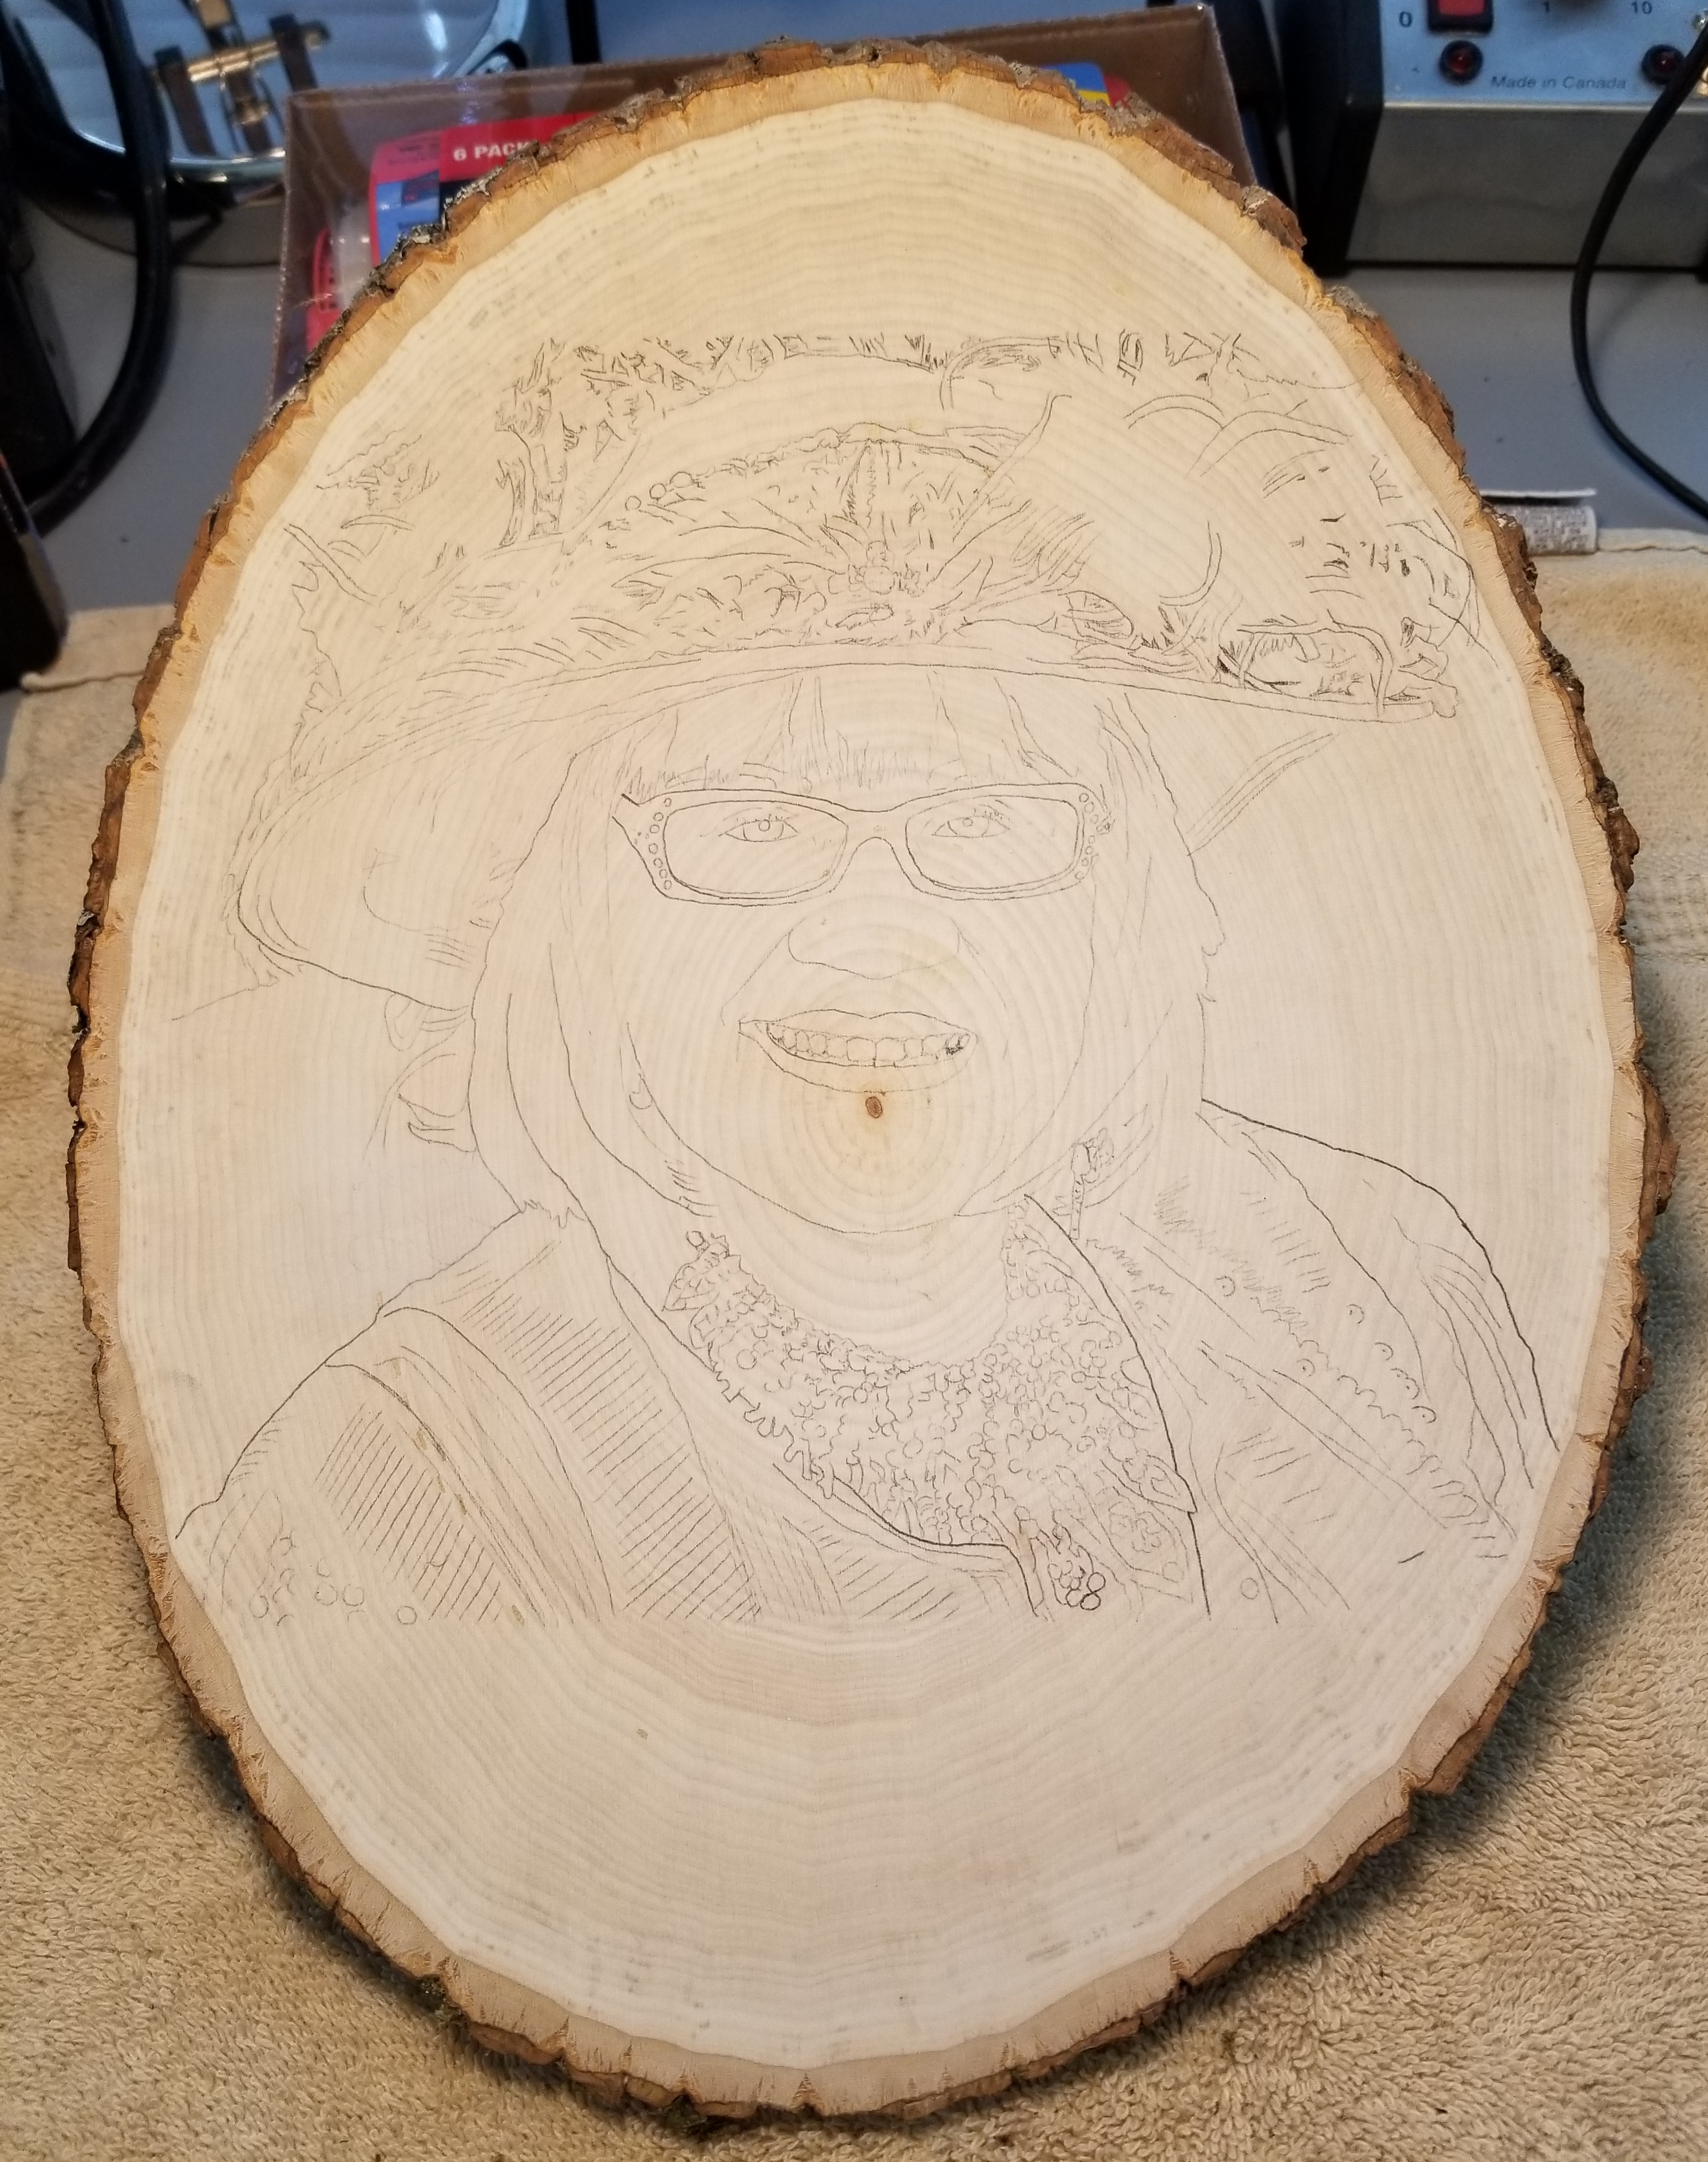
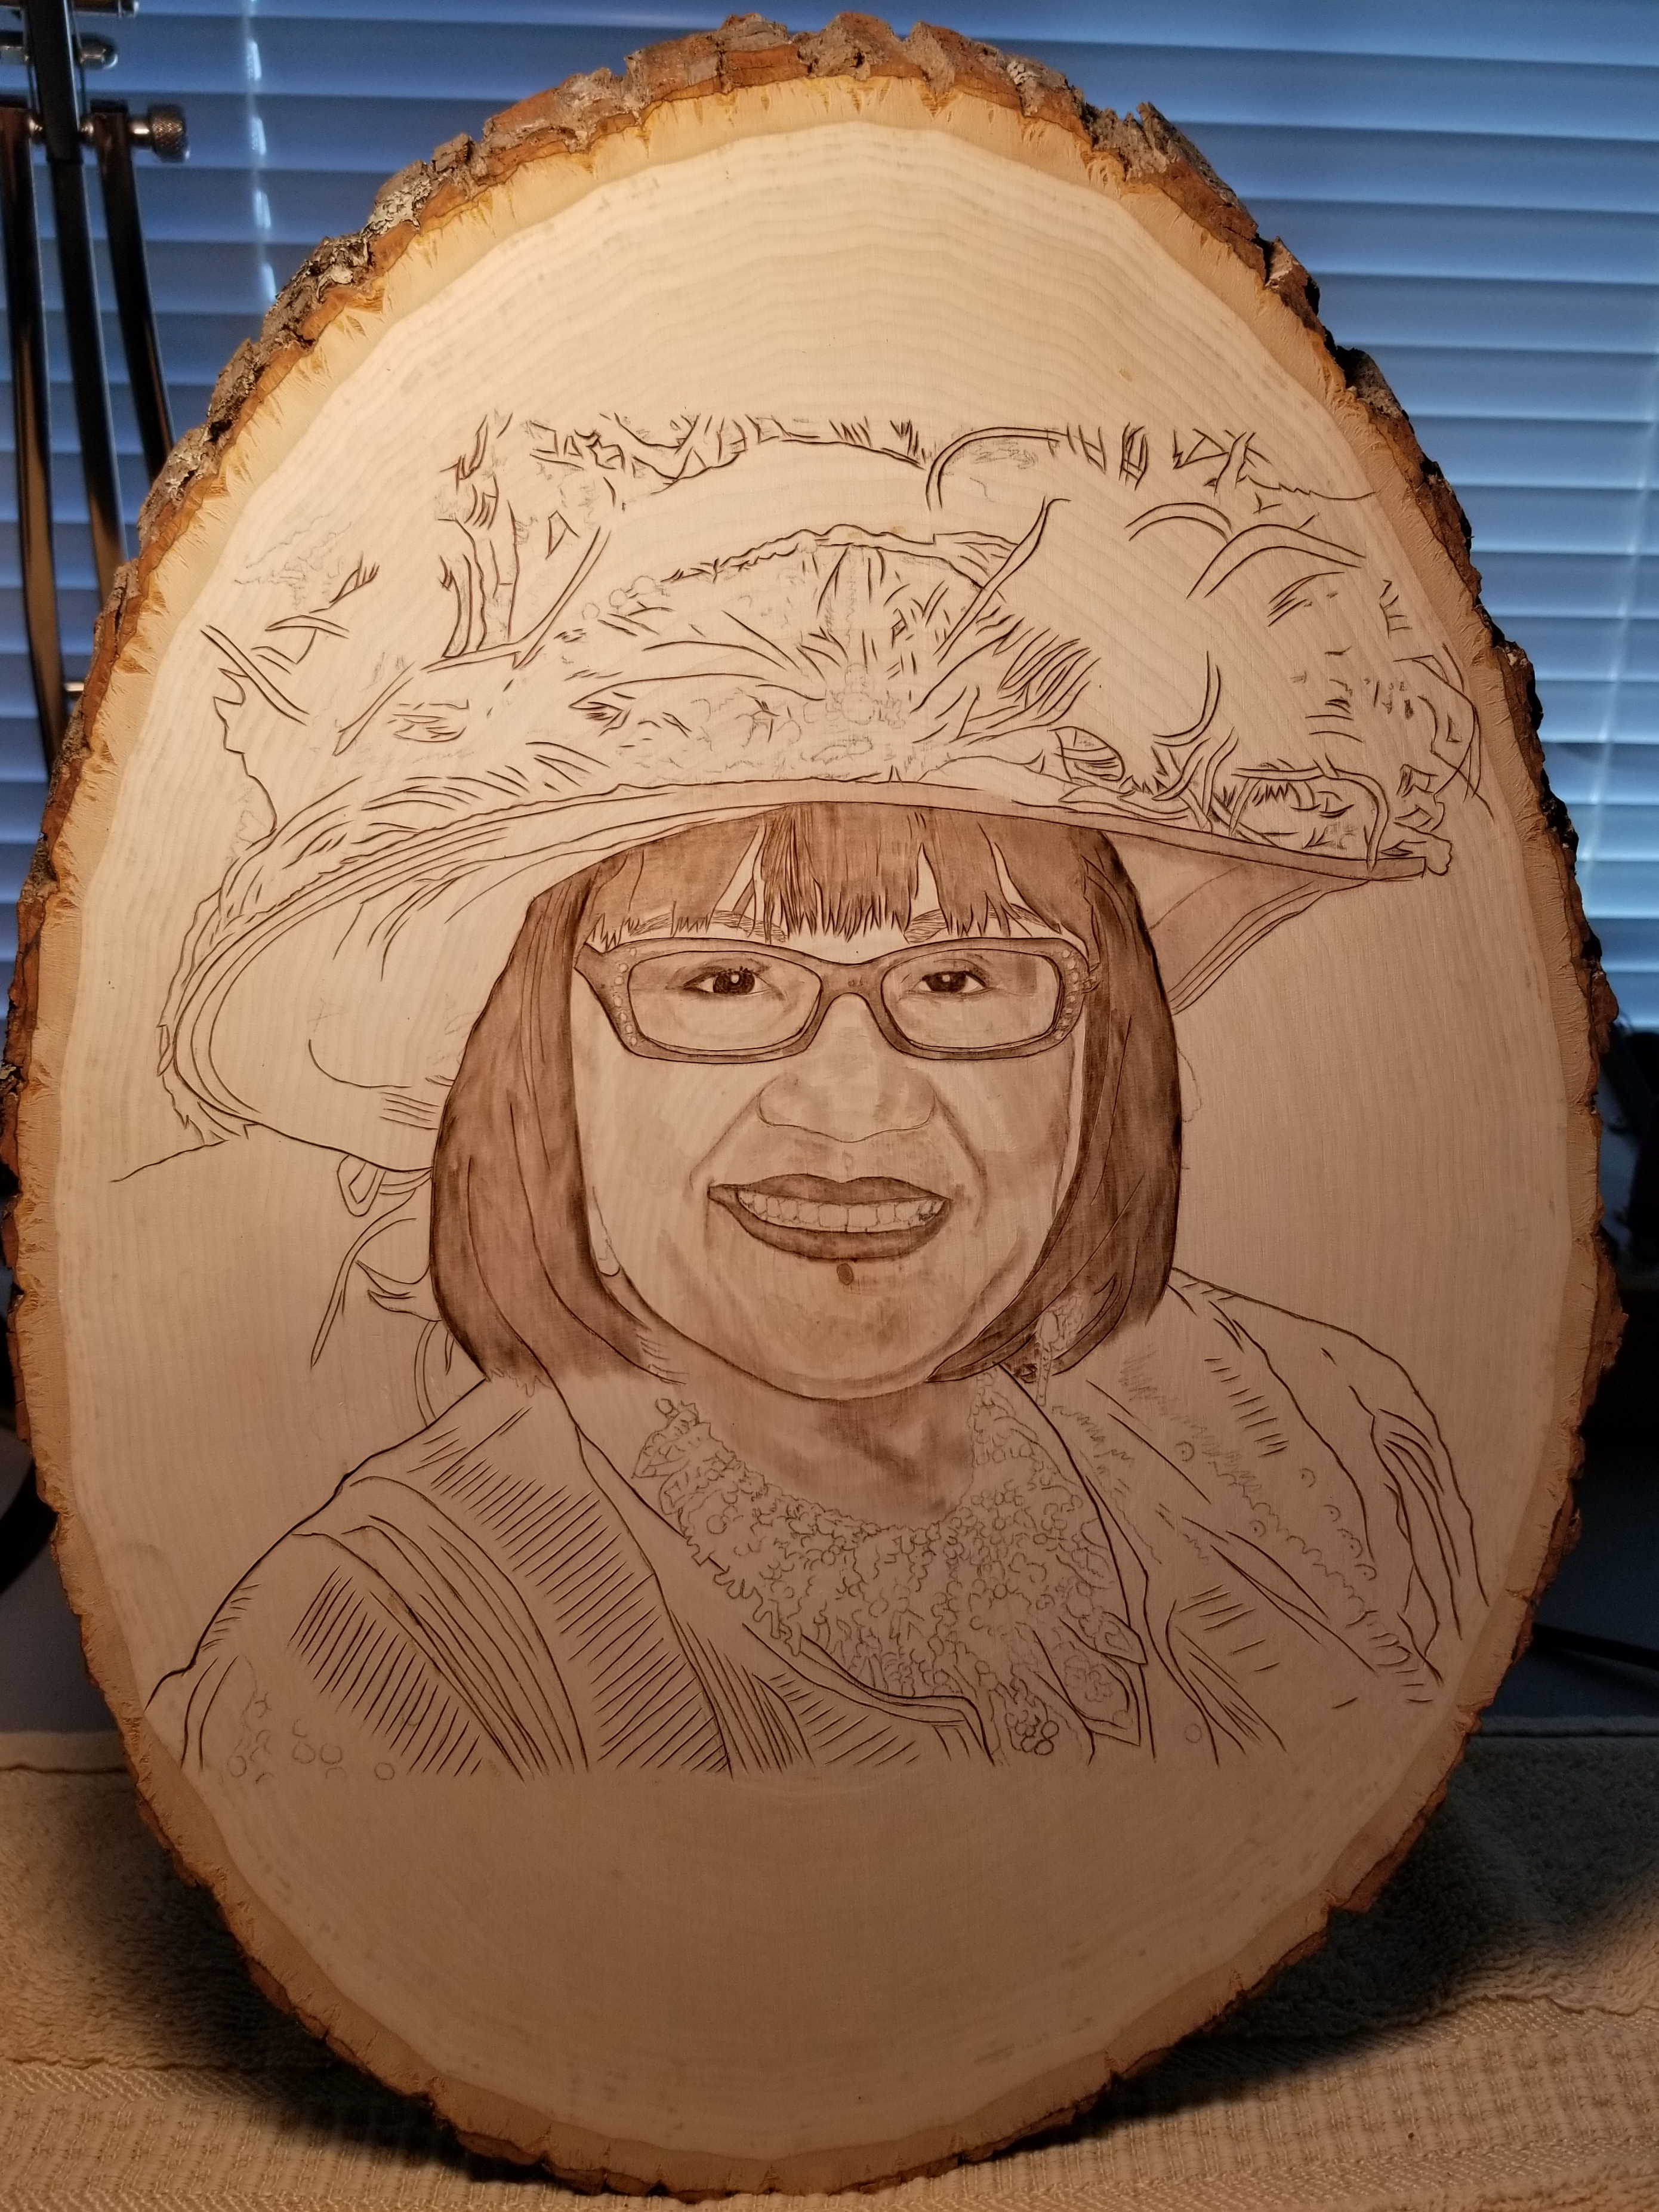
THE INITIAL OUTLINE

After confirming placement with my client, it’s time to transfer the initial outline onto the surface to be burned. For this part of the process, I use a sheet (or more, depending on the size) of graphite paper. How much or how little detail I choose to transfer from the photo is purely based on my artist's perspective. In this case, I wanted to ensure I got the placement of much of the detail work so that nothing was left to chance. Once the transfer is finished…which can take quite a bit of time on its own…the FUN part begins for me! The actual burning! ;)
BURNING THE INITIAL OUTLINE

Once most of the initial outline is burned, then I can really dig into drawing out the subject’s personality. This is my favorite part - the character reveal. I find it interesting how, as I burn and shade each piece, the PERSON begins to emerge from the project. In this way, I kind of connect with the ‘spirit’ of my subject - whether person or animal - to reflect their personality as it shines through the photo.
ADDING MORE SHADING AND DETAIL
I continue to build on layers of shading, and in this case, more line-work from the original outline.
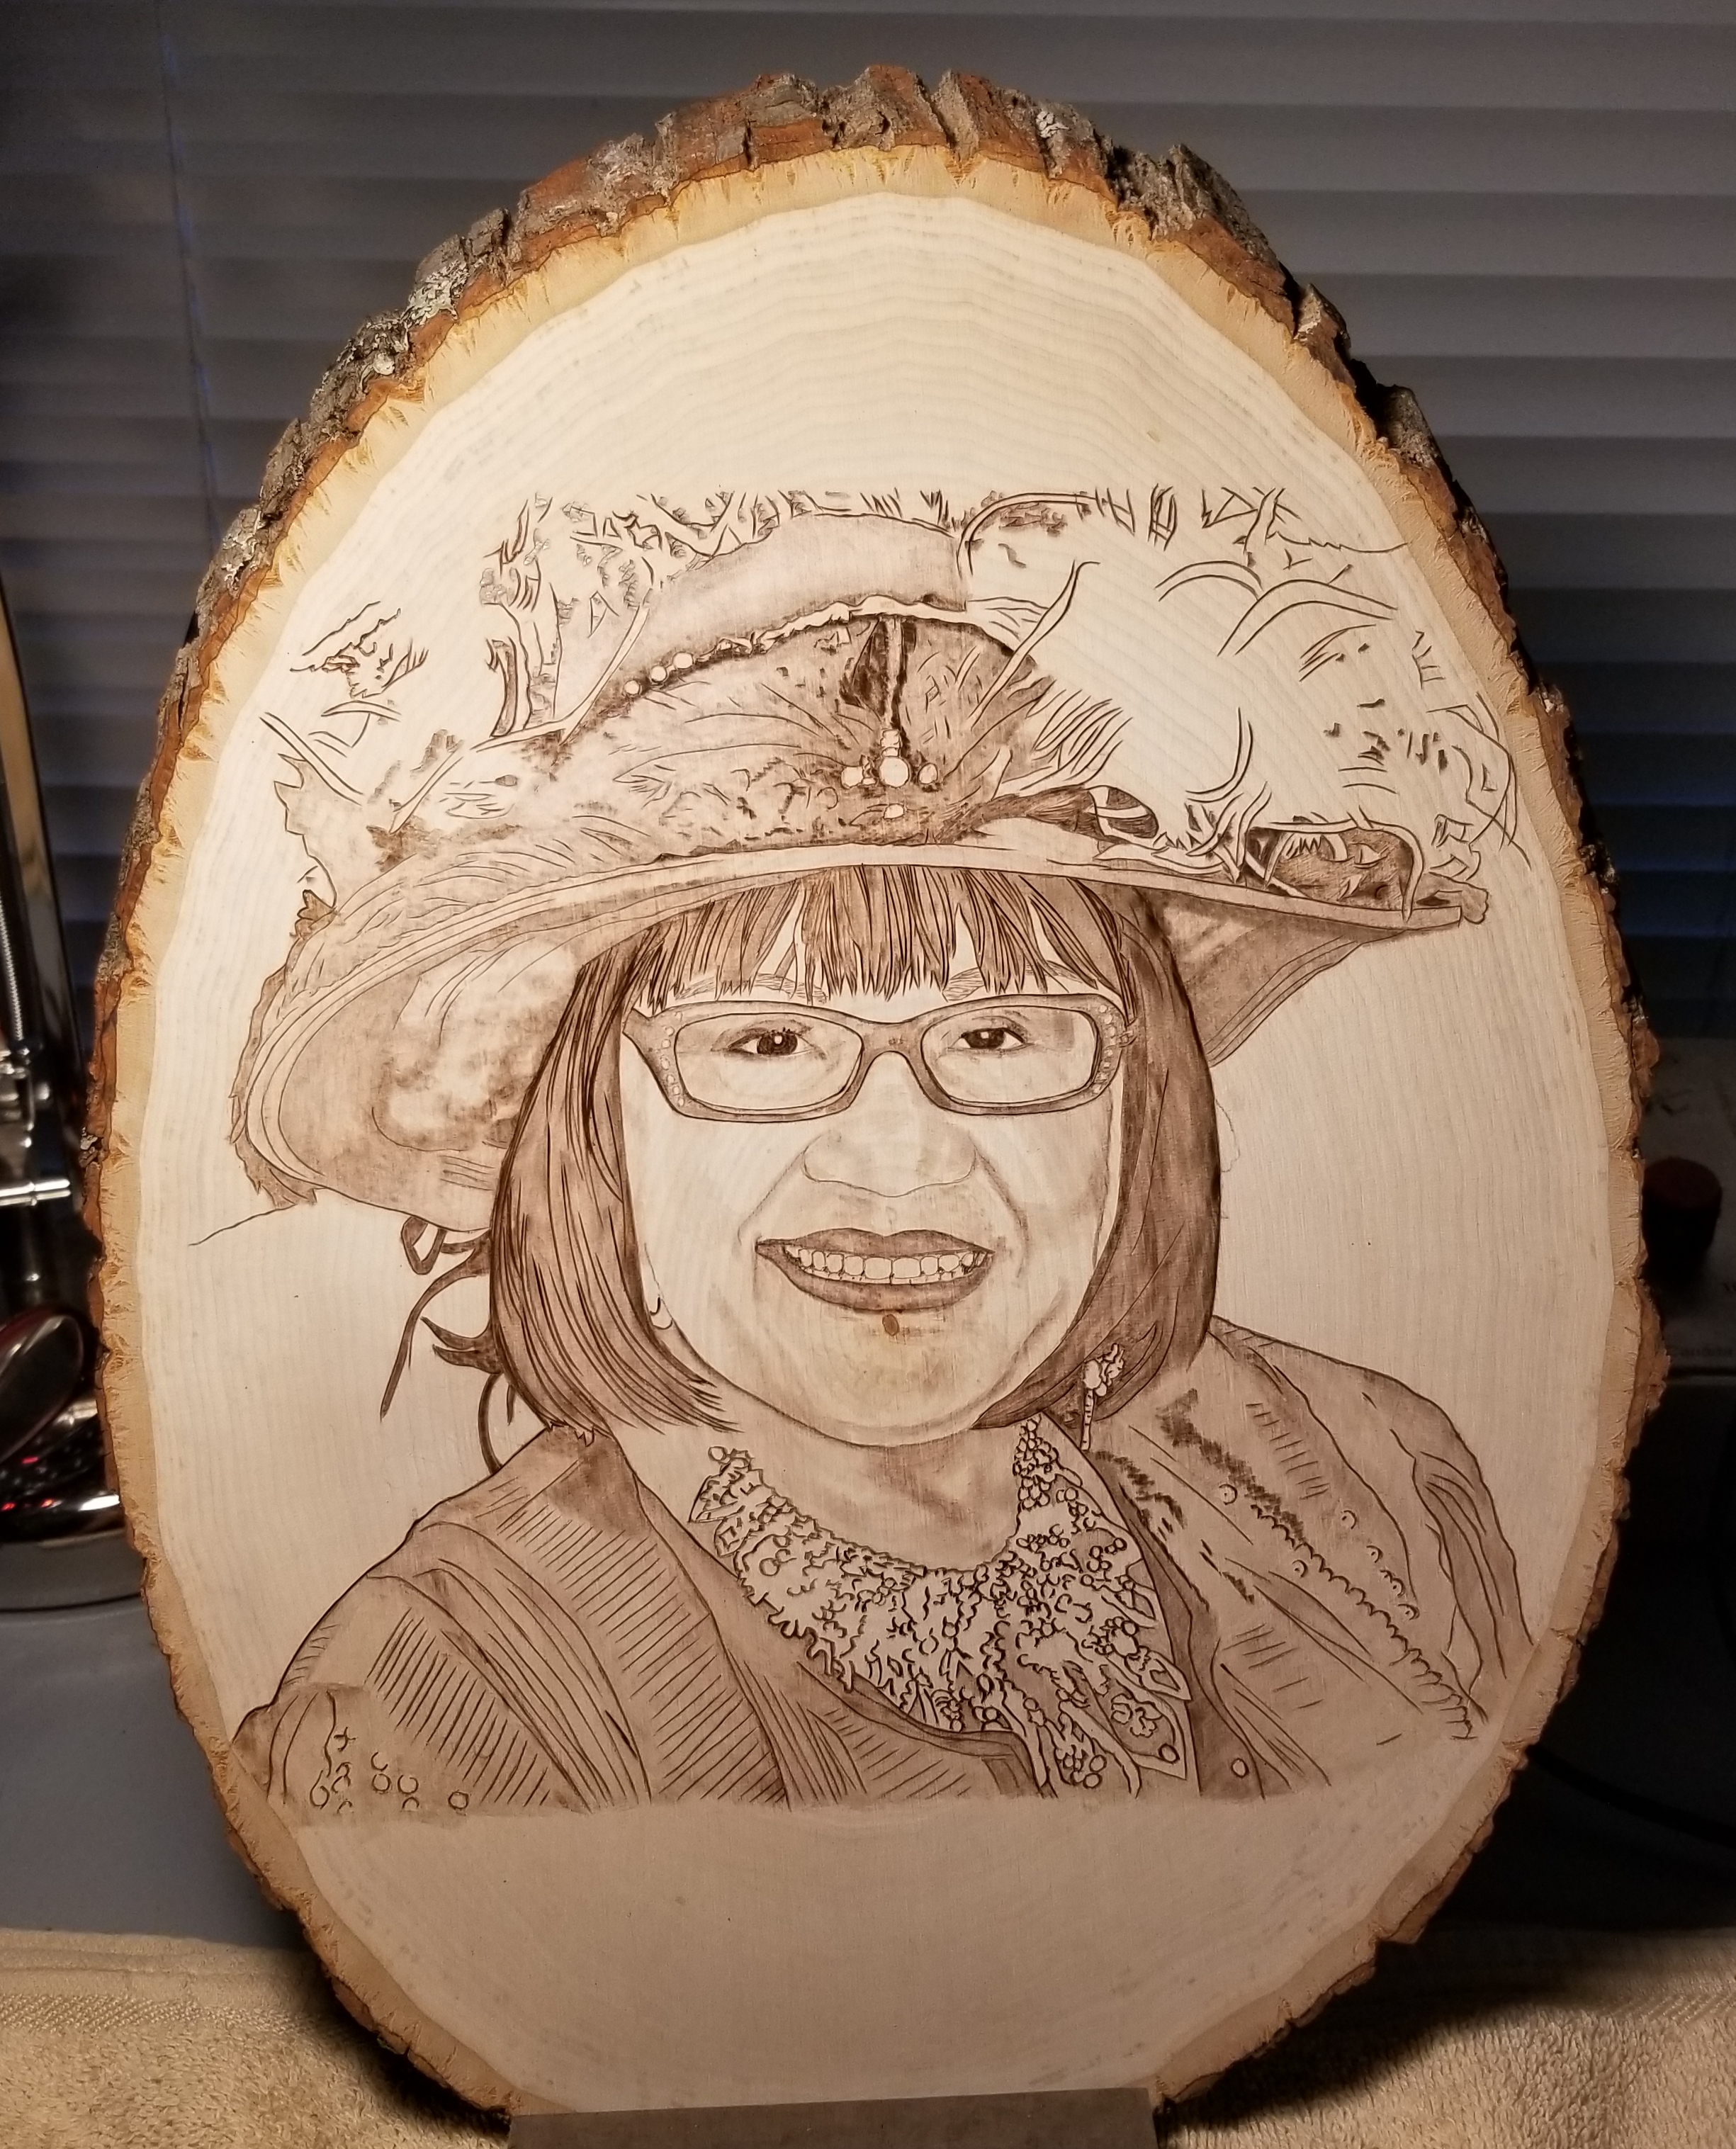
I usually start with a light burn, then go back and darken the areas that really jump out at me. This can be a never-ending process for an artist. Especially if you tend to be a perfectionist. I’ve had to learn, over the years, to arrive at a point where I just decide to call it done. Once the client is happy and satisfied, then I have to kind of force myself to just let go and call it good.
ADDING THE LETTERING
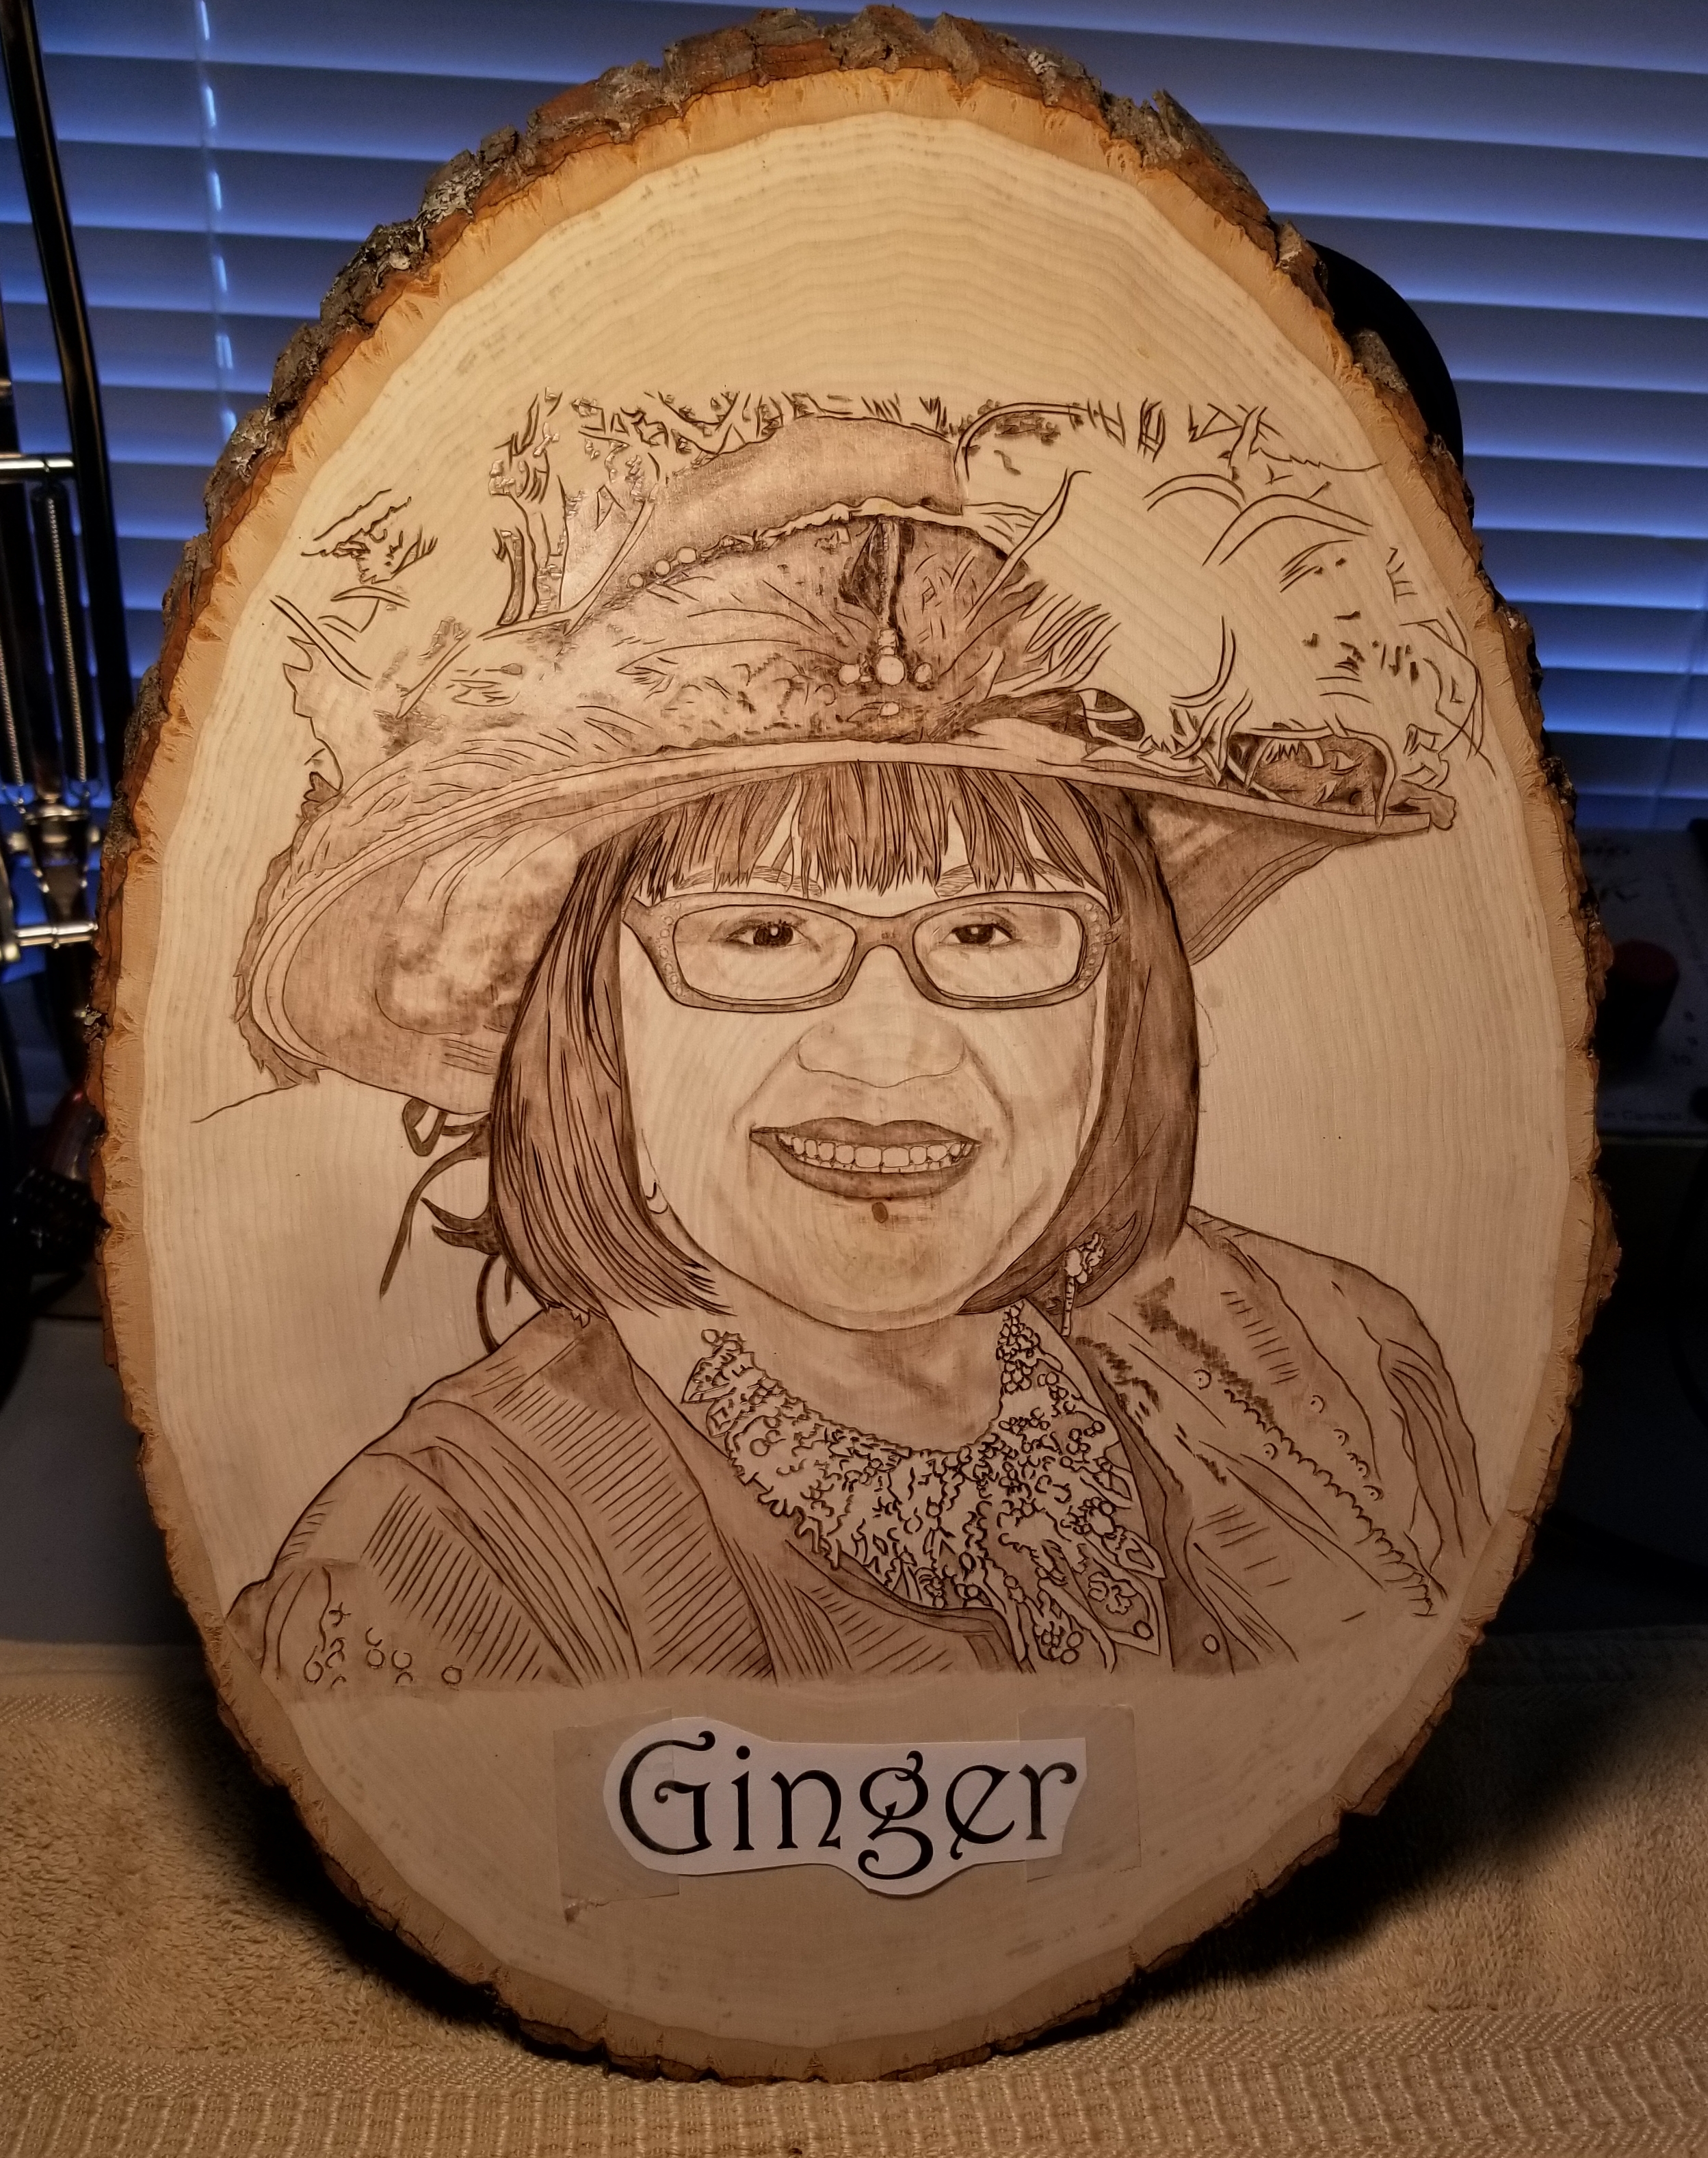
Next, I discuss font options for the lettering. I usually send 3-4 versions of the wording my client wants burned onto the project, and they choose which they like best. Then I print out an estimated size for the particular piece, position it, and snap a photo that I then send for approval. Sometimes I need to adjust the size or location to please my client. Once I get the go-ahead, I then transfer the lettering to the surface in the same way I transferred the artwork.

In many instances, as in this case, the font has a ‘thickness,’ with outer edges needing to be burned first, then filled in.
Another issue that comes up many times in portrait work, especially when burning onto raw, live-edge (bark-on) wood ovals, such as this one, is the ‘defects’ in the surface of the wood itself. In this case, you probably noticed the small knot below her lower lip. This kind of visible natural defect can detract from the beauty of the piece and needs to be resolved…which can be a challenge. In this case, I used a small amount of skin-tone-appropriate acrylic paint to gently cover and add highlights from the photo to turn what was a defect into an enhancement. See the difference in the photo below.
AND A POP OF COLOR!
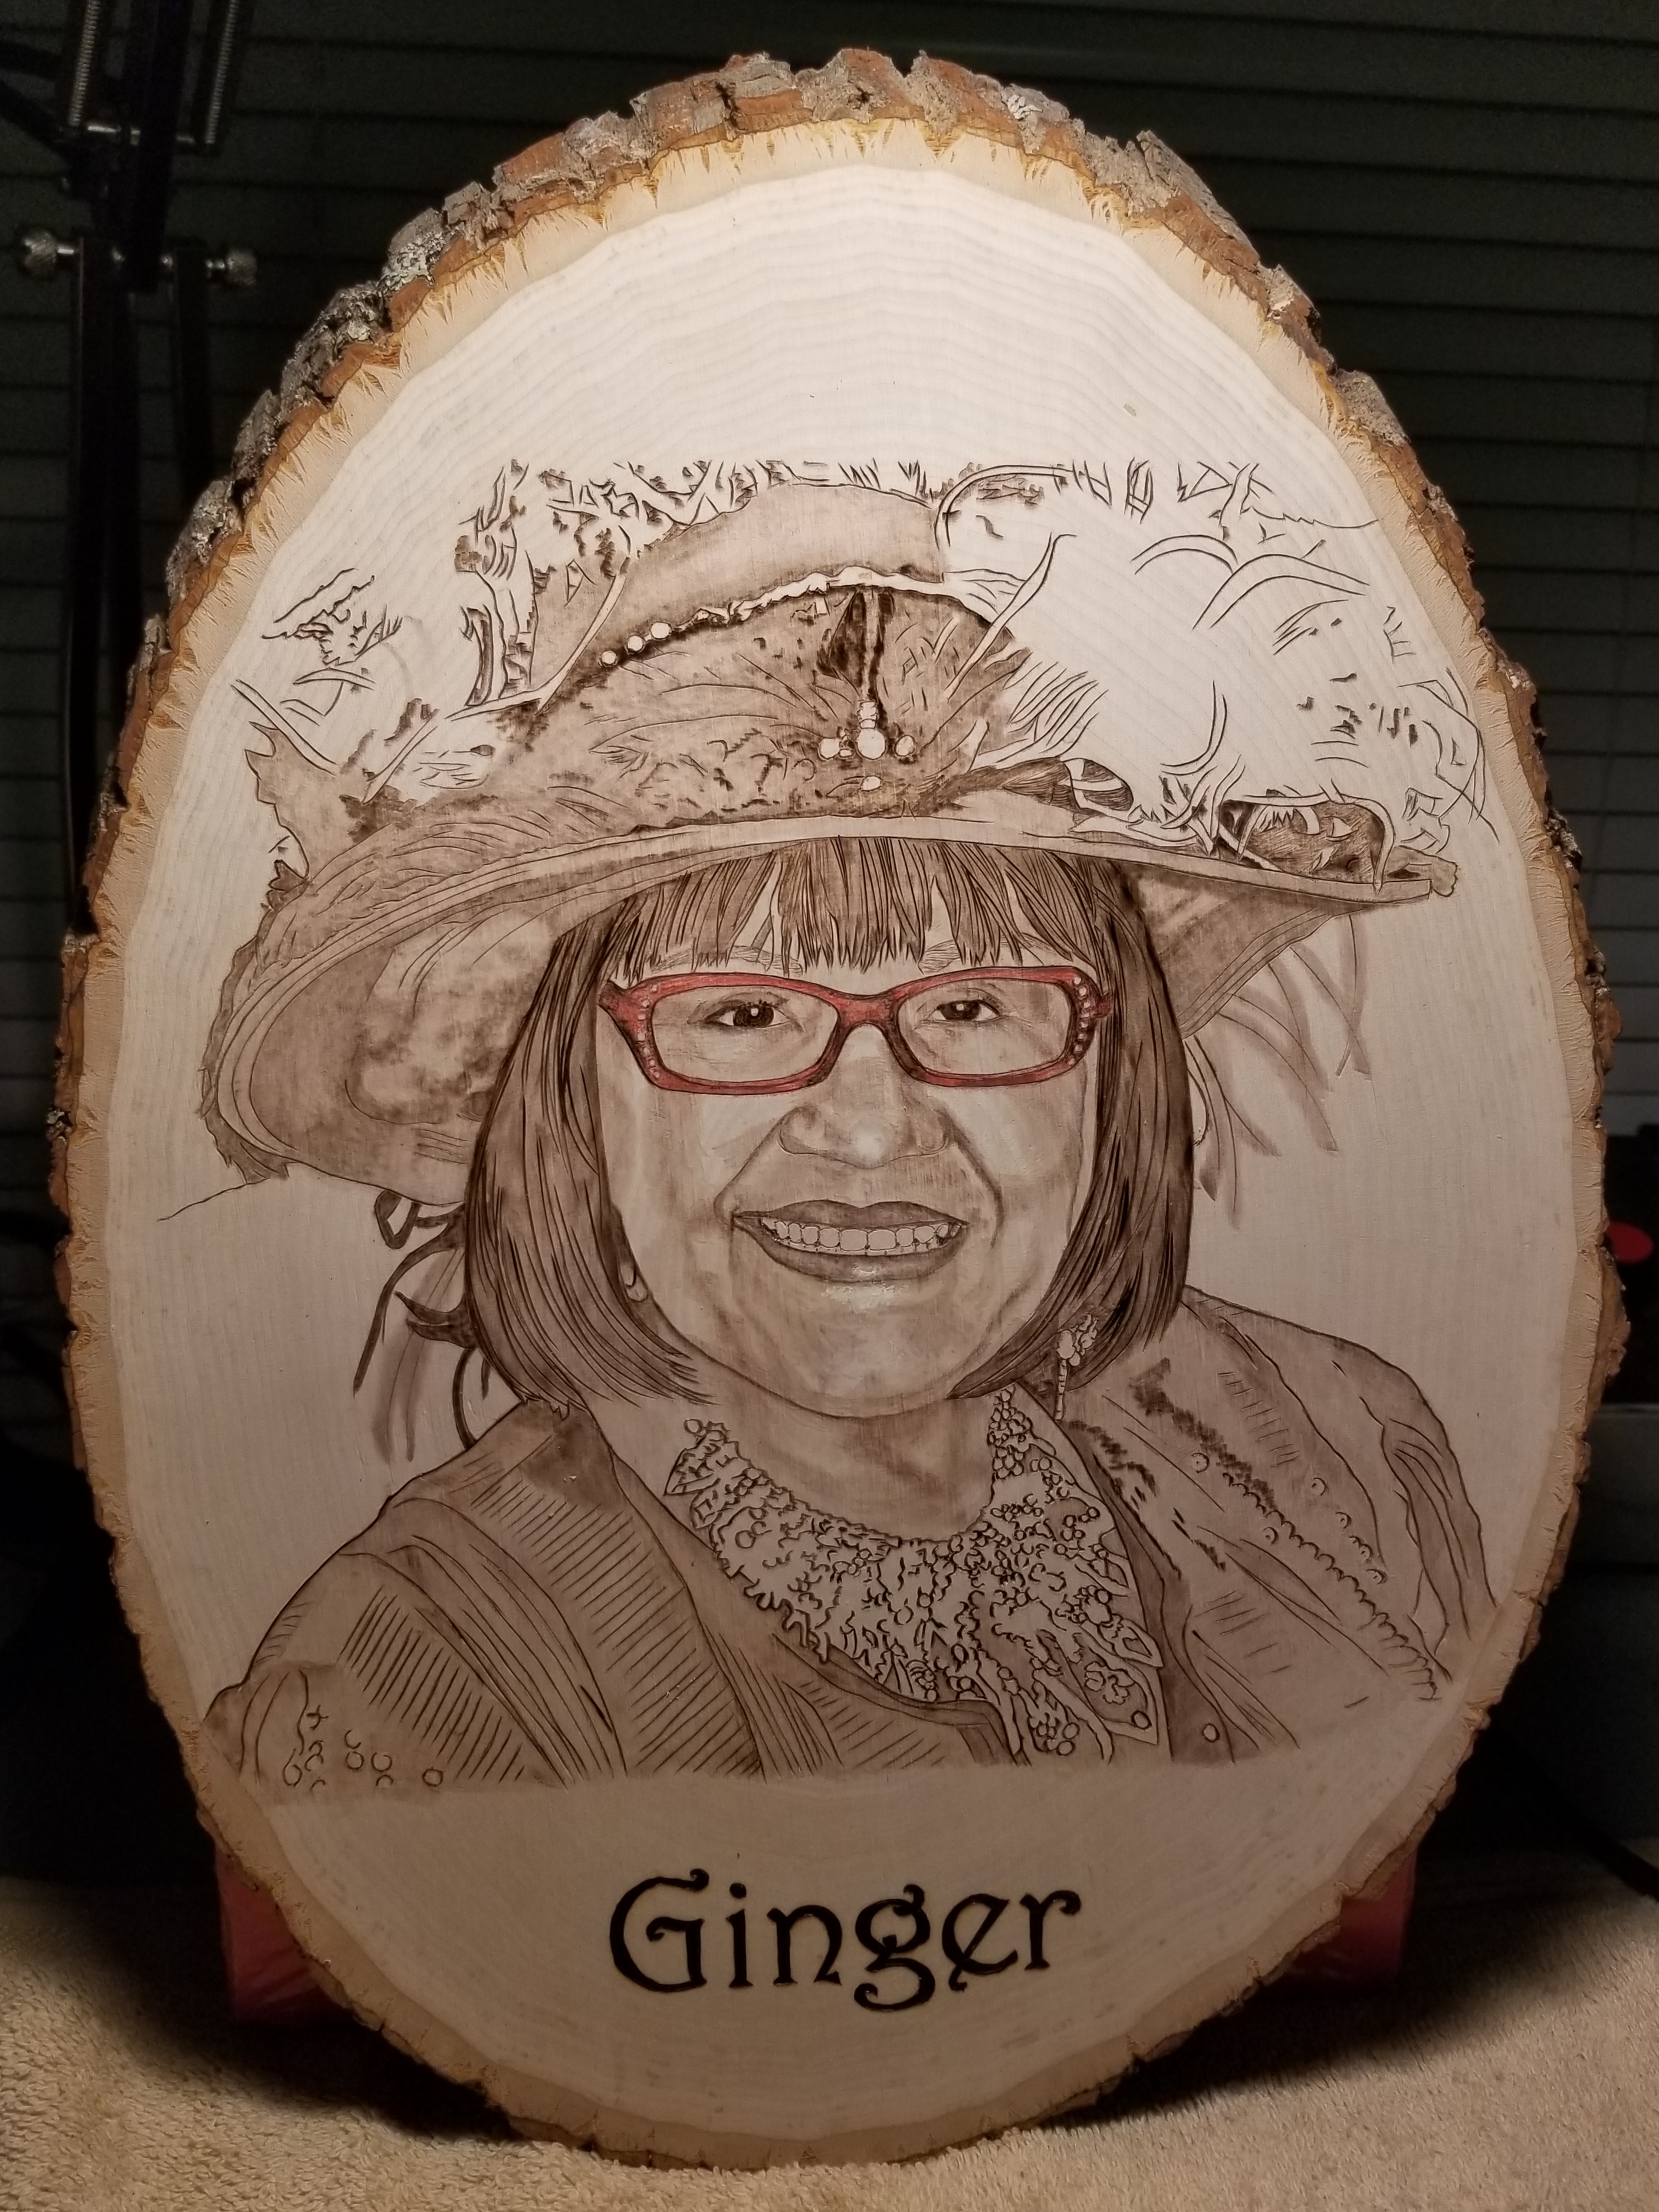
Not only did I manage to cover the knot under her lip, but I also balanced the appearance by adding another ‘highlight’ to the tip of her nose. My client was thrilled with the effect. A pyrographer has to be judicious in the use of paint or other topical treatments because these alter the surface of the wood so that the area can no longer be burned or shaded. So, it can be a tricky process. But it worked beautifully in this instance.
My client wanted to add a pop of color, red in particular, to bring out the subject’s vibrant personality. We decided to go for just the glasses. I used artist-grade oil-based colored pencils for this application.
SEALING WITH A LIGHT COAT OF VARNISH
The color on the glasses required sealing to protect it from fading, but you may be surprised to learn that even the burning will fade, over time, if not properly sealed. So, I use a very light coat of spray varnish to gently seal the piece and preserve it so that it remains vibrant for years to come.
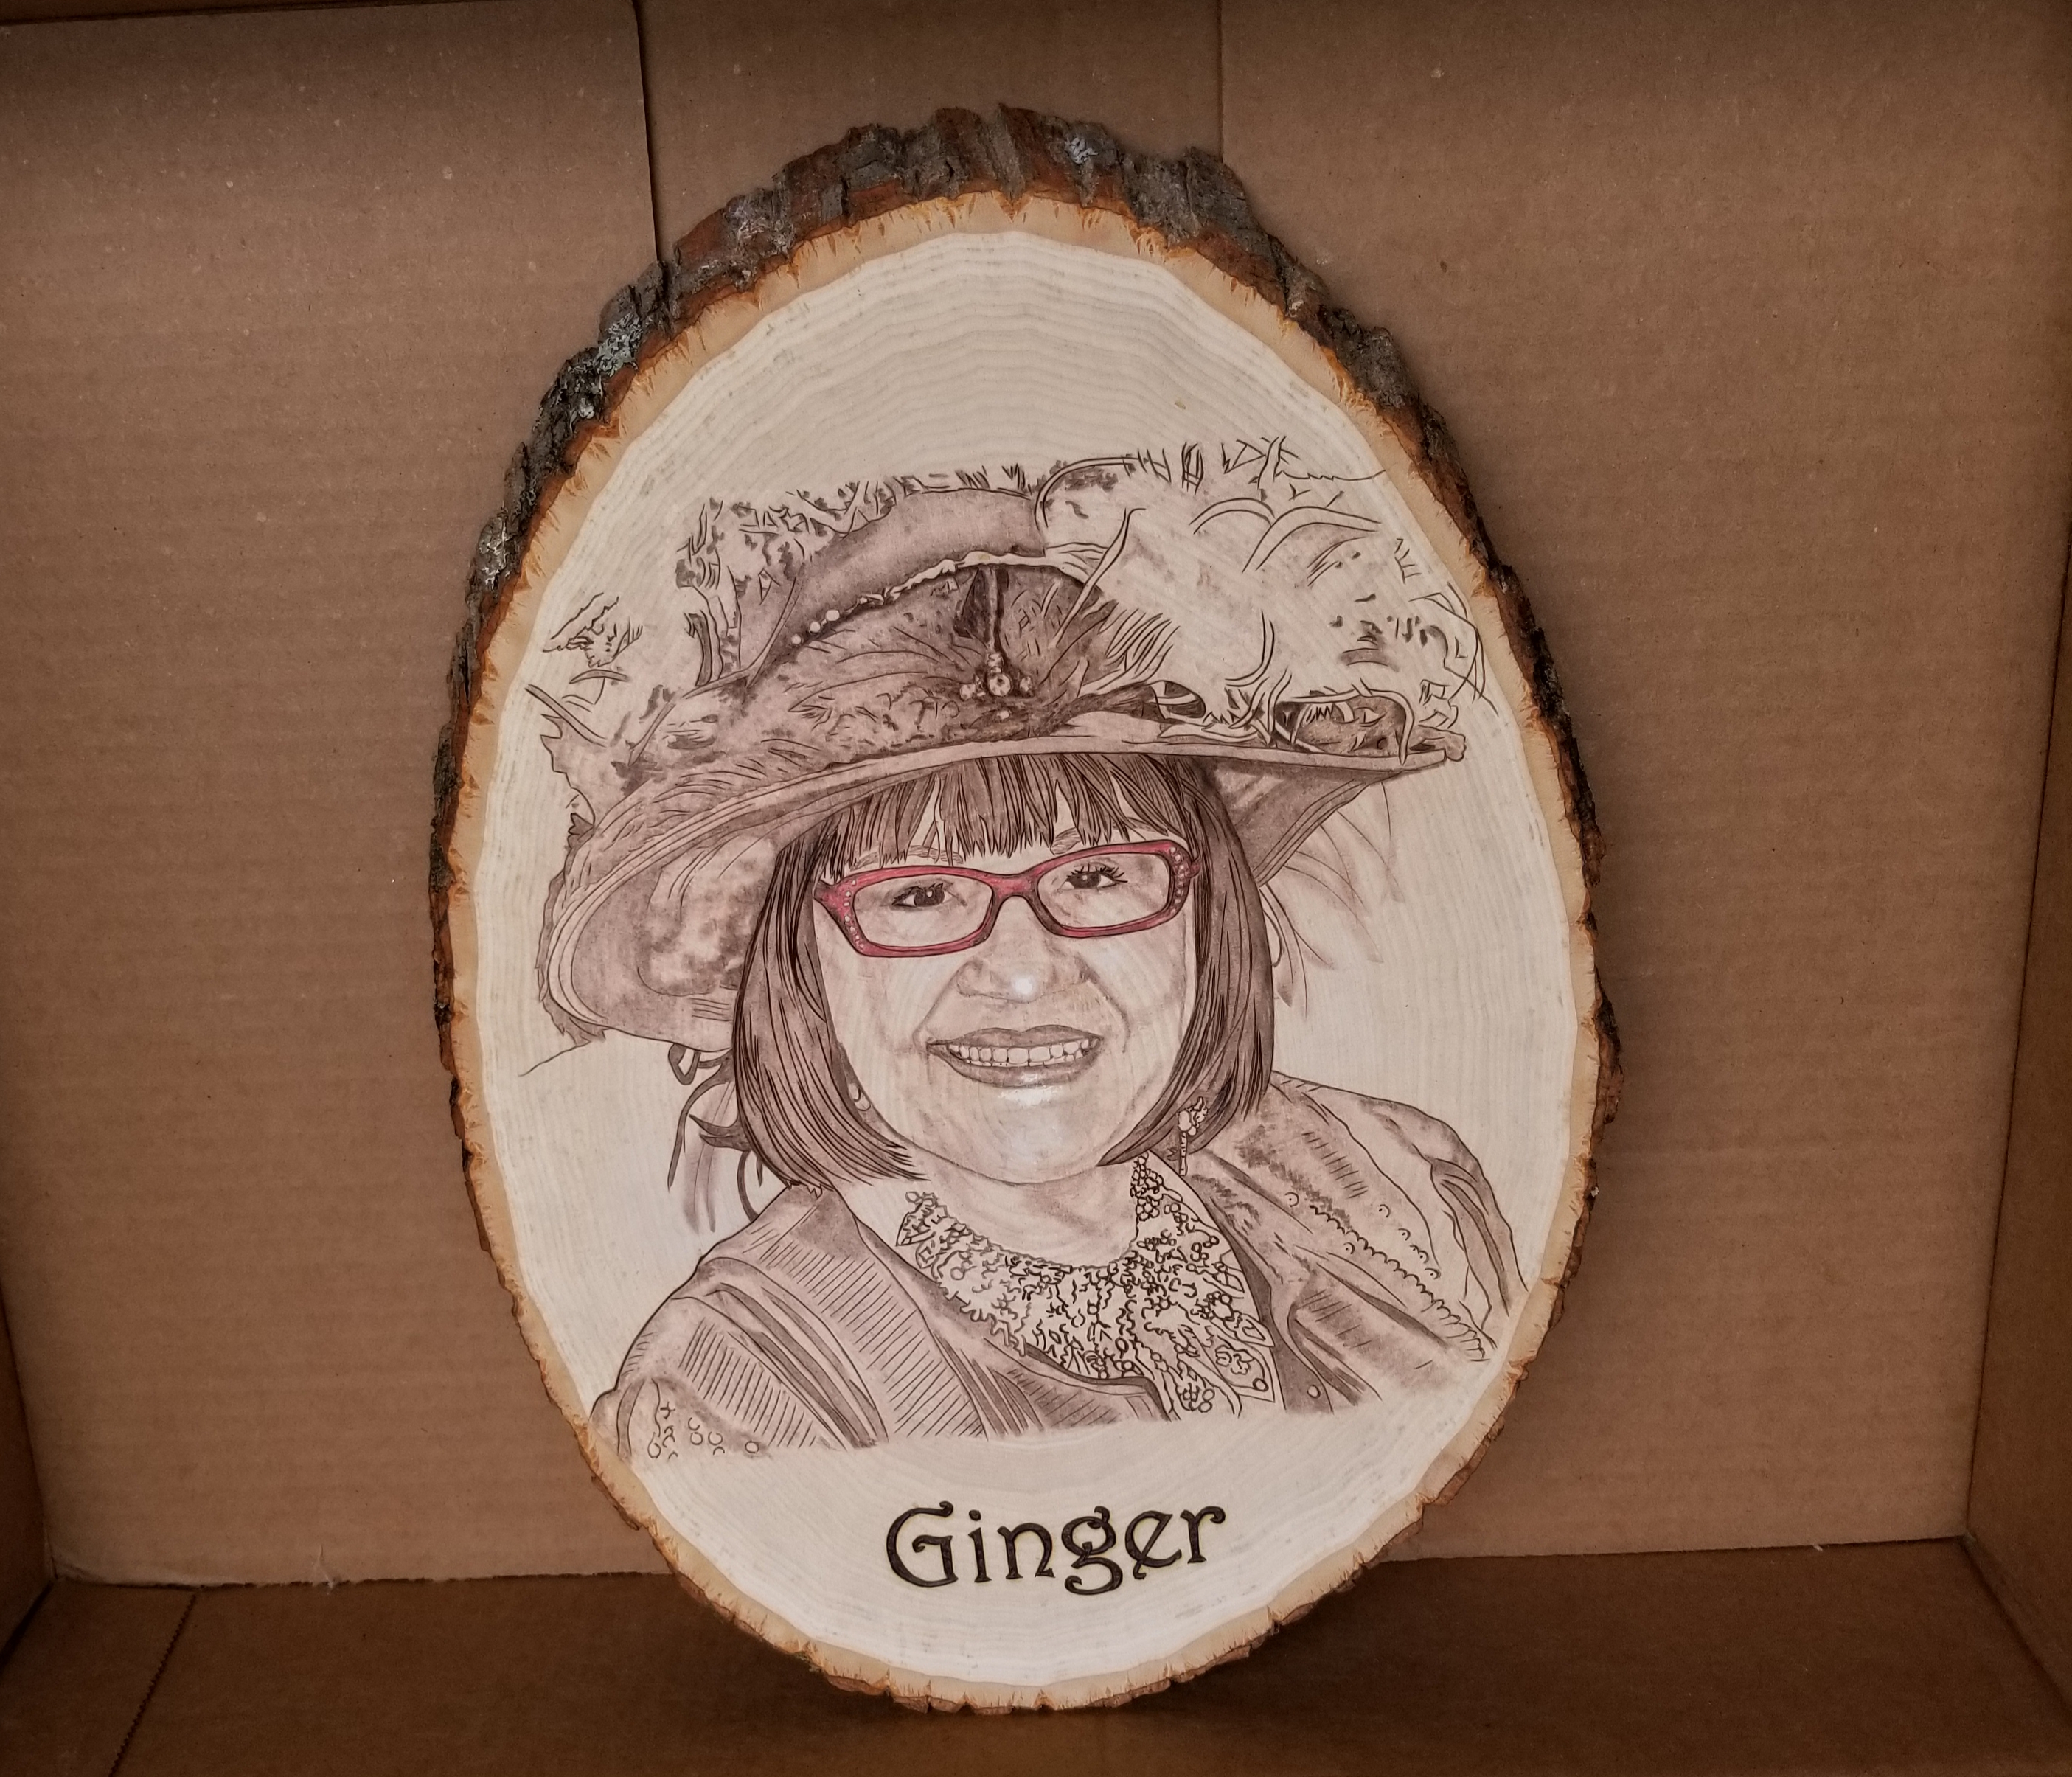
THE FINISHED PIECE
And there you have it! Some clients choose to have me burn my signature onto the front or back of a portrait. In this case, we left it as is.
I love the way she turned out. I hope you do, too!
Feel free to contact me if you’d like to have a portrait or other pyrography project burned.


